Table of Contents
ToggleProper overwatch isn’t about hovering over your team like a helicopter parent, it’s about positioning yourself where you can both protect teammates and punish enemies who step out of line. In Overwatch 2’s Season 14 meta, the difference between winning and losing often comes down to who controls space better, and that starts with understanding how to provide effective overwatch. Whether you’re holding high ground as Widowmaker, anchoring a position as Orisa, or finding angles as Baptiste, knowing where to stand and what information to communicate separates players who carry from those who get carried.
This isn’t some abstract concept that only matters in Top 500 lobbies. Every rank, from Bronze to Grandmaster, benefits when players understand proper positioning, crossfire setups, and how to maintain map awareness while supporting their team. You’ll learn the fundamentals that apply across all heroes, jump into role-specific strategies, and pick up advanced tactics that competitive teams use to dominate matches.
Key Takeaways
- Proper overwatch is about controlling space from positions where you can both protect teammates and threaten enemies without overextending or losing map awareness.
- High ground advantage and sightline control are fundamental to effective overwatch positioning, with the goal of covering multiple engagement zones rather than isolated chokes.
- Hero-specific strategies matter: Soldier: 76 and Ana excel at overwatch support, Widowmaker and Hanzo dominate long-range overwatch, while tanks create the space that makes overwatch possible.
- Effective communication—including enemy callouts, cooldown tracking, and ultimate status updates—multiplies the value of your overwatch positioning and prevents tunnel vision.
- Common overwatch mistakes like overextending, tunnel vision on targets, and poor rotation timing can be avoided through consistent map awareness, cover usage, and recognizing when to abandon positions.
- Map-specific positioning knowledge (like controlling the statue room on King’s Row or high ground on Dorado) combined with awareness of enemy composition allows you to adapt overwatch strategies throughout matches.
What Is Proper Overwatch and Why It Matters
Proper overwatch refers to positioning yourself in a location where you can observe the battlefield, provide supporting fire to teammates, and respond to threats without being caught out of position. It’s the tactical discipline of maintaining a position that offers both offensive and defensive value, think of it as controlling space rather than just occupying it.
In Overwatch 2’s fast-paced 5v5 format, losing a single player creates massive disadvantages. When you maintain proper overwatch, you’re creating a safety net that catches mistakes before they become team wipes. You’re denying flankers their favorite routes. You’re forcing the enemy to choose between ignoring you (and eating free damage) or committing resources to dislodge you.
The concept becomes clearer when you watch high-level play. A Soldier: 76 on high ground isn’t just farming damage, he’s threatening anyone who pushes his tank, deterring dive attempts on his supports, and maintaining sightlines that let him call out enemy rotations. That’s proper overwatch in action.
Most players understand the concept intuitively but fail in execution. They take good positions but abandon them too early, or they hold positions so stubbornly they become predictable. The sweet spot is flexibility: knowing when your overwatch position is working and when the fight has moved past it.
The Fundamentals of Effective Overwatch Positioning
High Ground Advantage and Sightline Control
High ground remains the most contested resource in Overwatch 2 for good reason. Elevation gives you better angles on shields and cover, reduces your hitbox exposure, and forces enemies to burn cooldowns or reposition to contest you. On maps like Dorado and Gibraltar, teams that control high ground typically control the pace of the fight.
The key is selecting high ground that overlooks multiple engagement zones. A perch that only watches one choke might feel safe, but you’re not actually providing overwatch, you’re just isolated. Look for positions that let you see where your team is fighting AND where enemies might rotate from.
Sightline control is equally critical. When you’re overwatching, you want to hold angles that threaten enemies but don’t overexpose you to crossfire. Position near corners or cover that lets you peek and withdraw without committing your entire body. Players who master support hero positioning understand this instinctively, they maintain healing uptime while minimizing their vulnerability.
Maintaining Cover While Monitoring Teammates
The worst overwatch position is one where you can see everything but die to the first bit of burst damage that comes your way. Always position near cover that you can use without abandoning your sightline completely. Natural cover (walls, pillars, doorframes) beats deployable shields because it can’t be destroyed.
Monitoring teammates means more than just keeping them in your peripheral vision. You need to track their health, their positioning relative to threats, and whether they’re about to get dove. Support players do this constantly, but DPS and tanks often tunnel on enemy positions and miss when their backline gets collapsed on.
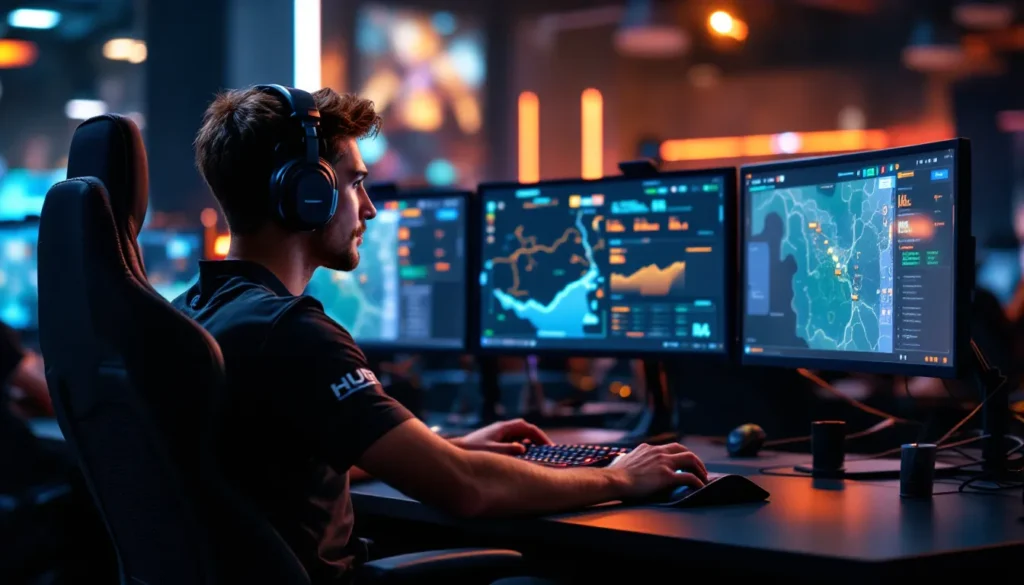
Use your camera to check teammate positions every few seconds, especially if you hear enemy flankers or abilities that suggest a dive is coming. The minimap helps, but it doesn’t show vertical positioning or tell you if your Ana is getting harassed by a Tracer.
Optimal Distance from Your Team
Standing too close to your team means you’re not actually overwatching, you’re just grouped up. Standing too far means you can’t support them when fights break out. The optimal distance depends on your hero’s effective range and mobility.
For hitscan heroes like Cassidy or Ashe, you want to be 15-25 meters from your frontline, close enough to pressure enemies who push your tank, far enough to have time to react to dives. Snipers can push this to 30-40 meters or more, but you sacrifice your ability to peel for supports.
Mobility heroes like Genji or Tracer can afford to position farther out because they can disengage quickly. Low-mobility heroes need to stay closer to their team’s defensive resources. If you’re playing Zenyatta and you’re more than 10 meters from your nearest teammate, you’re probably overextended.
Hero-Specific Overwatch Strategies
Best Overwatch Heroes for Supporting Fire
Some heroes are built for overwatch. Soldier: 76 might be the poster child, his sustained damage, self-heal, and sprint let him take and hold positions that support his team while remaining slippery. Baptiste brings incredible value with his vertical mobility and Immortality Field, letting him overwatch from positions other supports can’t reach.
Ashe dominates overwatch positioning with Dynamite for area denial and her coach gun for mobility. Ana might be the best support for pure overwatch value, her range lets her position safely while Sleep Dart shuts down flankers and divers who try to collapse your team.
Heroes with limited mobility or short range struggle with traditional overwatch. Reaper needs to be in the mix to do damage, though understanding effective Reaper positioning helps you provide value even with his limitations. Moira has to commit harder than other supports, making pure overwatch difficult.
DPS Heroes: Sniper and Mid-Range Overwatch
Widowmaker and Hanzo define long-range overwatch. They punish players who expose themselves for even a moment, and their threat alone forces enemies to play around walls and shields. Widow’s ideal position is high ground with multiple sightlines and an escape route via her grappling hook. Never overwatch from a position where you can be dove without options.
Hanzo trades some range for better close-quarters defense with Storm Arrows. He can overwatch from tighter positions than Widow, and his Sonic Arrow provides wall hacks that turn good overwatch into great overwatch.
Mid-range DPS like Cassidy and Soldier: 76 overwatch from medium distance, threatening enemies who push while staying close enough to peel for supports. Cassidy’s Flashbang (now Magnetic Grenade in current patches) makes him excellent anti-dive, while Soldier’s Helix Rockets and Sprint let him reposition as fights shift.
Tank Positioning for Team Protection
Tanks don’t typically overwatch in the traditional sense, they’re usually the ones being overwatched. But tank positioning creates the space that makes overwatch possible. When Orisa or Sigma holds a position with their shields, they’re creating a forward operating base that DPS and supports can work from.
Reinhardt struggles with overwatch because his shield demands he face threats directly, but smart Rein players position at chokes where teammates can shoot around them. Zarya enables overwatch by using Projected Barrier on teammates who take aggressive positions, they can play more boldly knowing they have bubble support.
Wrecking Ball and D.Va create chaos that forces enemies to turn their attention away from your team’s overwatch positions. When a Ball slams into the backline, suddenly that enemy Widow can’t focus on your team, she’s trying not to die. Understanding how to counter enemy tanks helps you recognize when your tank positioning is working and when you need to adapt.
Support Heroes: Healing While Overwatching
Support overwatch is the trickiest because you’re balancing damage output with healing priority. Ana does this best, her scope lets her heal from overwatch positions while threatening enemies with her damage and utility. Position where you can see both your team and likely enemy approach angles.
Baptiste brings similar value with his vertical mobility letting him take unusual overwatch positions. His Amplification Matrix turns good overwatch into fight-winning pressure when your team shoots through it from a strong position.
Zenyatta overwatches by marking enemies with Discord Orb while maintaining healing on teammates. He can’t reposition easily, so his overwatch positions need to be extra safe. Stay near corners and always have an escape plan when flankers are in play.
Mercy and Kiriko use mobility to overwatch dynamically, they’re not holding one position but moving between teammates, which lets them spot threats from multiple angles. Their overwatch value comes from awareness rather than static positioning.
Communication and Callout Essentials
Critical Information to Share with Your Team
Overwatch positioning is wasted if you’re not communicating what you see. The most important callouts are enemy positions, especially flankers that your team might not spot. “Tracer behind” or “Genji on our Ana” gives your team time to react.
Cooldown tracking matters in higher ranks. When you see enemies burn important abilities like Zarya’s Projected Barrier or Kiriko’s Teleport, call it out. Your team can capitalize on those windows.
Ultimate status is critical. If you hear an enemy Genji say his ultimate voice line, call it out even if it seems obvious. Not everyone catches every audio cue mid-fight. Similarly, announce when you spot enemies grouping for what looks like an ultimate push.
Don’t over-communicate. Cluttering voice chat with play-by-play of every damage number you deal is annoying and obscures important information. Focus on actionable callouts that change how your team should play the next 5-10 seconds.
Using Ping Systems and Voice Chat Effectively
Overwatch 2’s ping system is underrated. Many players in ranks below Diamond don’t use voice chat consistently, so pinging enemy positions, targets to focus, and danger zones provides value even in silence. Ping flankers the moment you spot them, don’t wait to see if they commit.
Voice chat becomes essential in Diamond and above where coordination wins fights. Keep callouts short and specific: “Cree flank right” tells your team more than “guys watch out.” Use hero names or positions, not vague descriptions.
If you’re providing overwatch, announce your position at the start of fights: “I’m top right watching” tells your team where to expect supporting fire and where NOT to position (you don’t want three people on the same angle).
Combine pings with voice for maximum effect. Ping the enemy Widow and say “Widow top left” and now even players not in voice know where to look. Esports coverage from outlets like Dot Esports often highlights how professional teams layer communication, watch VOD reviews to see how it’s done.
Common Overwatch Mistakes and How to Avoid Them
Overextending and Losing Map Awareness
The #1 overwatch mistake is pushing too far forward when you score a pick or two. You had a good position, got value, saw enemies retreat, and then you chase and die in a bad position. Resist the urge to follow low-health enemies into areas where you lose your advantages.
Map awareness dies when you focus too hard on one angle. You’re watching the choke so intently that you don’t notice your team rotated, or the enemy flanked, or the objective is being contested. Set a mental timer to check your surroundings every 5-10 seconds.
Overextending also means taking overwatch positions your team can’t support. If you’re playing Widowmaker on one side of the map while your team is pushing the other side, you’re not providing overwatch, you’re solo fragging (or feeding). Your position should support your team’s gameplan, not exist in isolation.
Tunnel Vision on Targets
Tunnel vision happens to everyone. You’re dueling their Widow, trading shots, mind-gaming positioning, and you don’t notice their Tracer just stuck your Ana and your team is collapsing. Overwatch positioning is worthless if you’re so focused on one threat that you miss others.
Build a habit of resetting your focus after every engagement. Scored a pick? Great. Now scan for the next threat instead of admiring your work. Missed your shot? Don’t immediate re-peek the same angle, check if the situation changed.
DPS players tunnel vision on damage opportunities. Support players tunnel vision on keeping one critical teammate alive. Tank players tunnel vision on the enemy tank. Everyone does it. The fix is conscious effort to zoom out mentally after every few seconds of focused play.
Poor Rotation Timing
Knowing when to abandon your overwatch position is as important as taking it. Common mistakes include holding a position after your team has moved on, or rotating too early and leaving teammates without support.
Watch for fight state changes. If your team wins the fight, you can usually afford to push up and claim new overwatch positions. If your team is losing, recognize it early and rotate to a defensive position rather than dying in your original spot.
Poor rotation timing also means moving at the same time as your teammates. If everyone rotates together, you create a window where nobody is watching flanks or providing covering fire. Stagger your rotations, one player moves while others cover, then they leapfrog forward.
Map-Specific Overwatch Positions
Control Maps: King’s Row and Numbani
King’s Row point A gives attackers the building to the right of the choke (statue room) as premium overwatch real estate. From the upper window, you can pressure defenders on point while remaining hard to dislodge. Defenders want the high ground near the point itself, which overlooks both the choke and the flank routes.
On King’s Row streets phase, the high ground on the right side (attackers’ perspective) provides sight lines down the entire street. Defenders can overwatch from the building opposite, creating a high-ground battle that often decides the fight.
Numbani point A is all about the high ground overlooking the statue. Whoever controls this position dictates the pace. Attackers need to either claim it or force defenders off it before committing to point. The right side flank (through the small room) provides an alternate overwatch angle that’s safer but has less coverage.
Numbani’s streets favor the left-side high ground, which lets you see the payload path and the main route. Many guides on sites like The Loadout emphasize controlling this position as the attacking team pushes through the narrow corridors.
Push Maps: New Queen Street and Colosseo
New Queen Street is a sightline war. The buildings flanking the robot path provide constant overwatch positions, but they change as the robot moves. Focus on taking positions one “block” ahead of the robot, so you’re threatening enemies who contest while maintaining escape routes backward.
The narrow alleys and verticality mean heroes like Baptiste and Hanzo thrive here. Position on second-floor windows or balconies that overlook the robot while staying out of easy dive range.
Colosseo features more open space around the central arena. The archways and pillars around the perimeter provide overwatch positions with natural cover. Key is positioning where you can see the robot without standing in the wide-open colosseum floor where you’re vulnerable from multiple angles.
Both push maps reward teams that maintain forward overwatch positions. Because the objective moves, static positions become liabilities, you need to rotate as the robot advances or retreats.
Escort and Hybrid Map Strategies
Dorado is overwatch heaven. Almost every section has high ground overlooking the payload path. Attackers want to claim high ground ahead of the payload and force defenders to either contest from a disadvantage or cede space. Defenders need to contest high ground early or they’ll get slowly pushed back.
The final stretch of Dorado (before the last point) has the raised platform on the left that’s critical. Controlling this position lets you pressure the payload and the main route simultaneously.
Eichenwalde castle is unique because the attacking overwatch position (bridge high ground) is far from the point, making it hard to support teammates who commit to point. This is intentional, you need to choose between safe overwatch or closer support. Most teams send tanks to point while DPS and support overwatch from bridge, ready to collapse if the tank creates space.
Hybrid maps require position flexibility. The payload phase plays differently than the point phase, and overwatch positions that worked for point capture become useless once you’re escorting. Recognize these transitions and adapt.
Advanced Tactics for Competitive Play
Crossfire Setup and Flanker Denial
Crossfire is when two or more players position at angles that force enemies to choose which threat to face, if they cover from you, they expose themselves to your teammate. Setting up crossfire from overwatch positions is deadly. Put your hitscan on high ground right, your tank holding center, and suddenly enemies can’t peek either without eating damage.
The key is spacing. If you’re too close to your teammate, one shield blocks both of you. If you’re at 90+ degree angles from each other with the enemy in the middle, shields become way less effective.
Flanker denial is about positioning to cut off routes before flankers use them. If you know their Tracer likes the left flank, position where you can see that route while still supporting your team. Your presence alone denies the route, Tracer won’t commit if she knows she’s spotted.
Advanced teams assign one player to “anti-flank” duty, which is specialized overwatch focused entirely on protecting the backline. Usually a hitscan DPS or a support like Ana takes this role, positioning to intercept flankers rather than pressure the enemy frontline.
Ultimate Economy and Overwatch Positioning
When your team has ultimate advantage, use overwatch positions to bait enemy ults. Position aggressively enough that enemies feel pressure, but with escape routes so you can survive their counter-ults. Force them to burn Sound Barrier or Transcendence before your team commits its offensive ults.
When you’re down on ults, overwatch positioning becomes defensive. Fall back to positions that are harder to dive and make enemy ults harder to execute. Spread out so Graviton Surge or EMP can’t catch everyone.
Some ults demand specific overwatch positioning. If your Ana has Nano Boost, position where you can safely nano your carry and then support them. If enemy Genji has Dragonblade, position near your supports so you can peel when he dives.
Game sense around ultimate economy separates good players from great ones. Coverage from outlets like IGN often features pro player interviews discussing ultimate tracking, it’s worth studying.
Adapting Your Position Based on Enemy Composition
Enemy running dive (Winston, D.Va, Tracer, Genji)? Your overwatch positions need to be tighter to your team so you can collapse on divers. High ground that’s far from your supports becomes a liability because you can’t peel.
Enemy running poke (Sigma, Hanzo, Ana)? Spread out more and use longer sightlines. They want to farm ultimate charge off grouped targets, so make them work for it.
Enemy running brawl (Reinhardt, Reaper, Moira)? Maintain distance with your overwatch positions. They want to close the gap and brawl, don’t let them. Keep them at range where your team’s damage output is higher.
Counter-picking impacts overwatch too. If they swap to Widowmaker specifically to contest your overwatch positioning, you either need to out-duel them, swap to a hero that doesn’t rely on exposed positions, or play around hard cover that blocks sightlines. Don’t stubbornly hold positions that are being hard-countered.
Training Drills to Improve Your Overwatch Skills
Custom games are your friend for drilling overwatch fundamentals. Set up a custom game on King’s Row and practice holding the statue room high ground against AI or a friend playing flanker. Work on maintaining your position, using cover, and tracking threats.
Positioning drills: Pick a hero and spend 10 minutes in a custom game just moving between overwatch positions on a single map. Don’t even shoot, just practice finding spots with good sightlines and cover, and moving between them efficiently. This builds your mental library of positions.
Awareness drills: Play Deathmatch but force yourself to check behind you every 5 seconds. It feels weird and you’ll die a lot at first, but it builds the habit of maintaining 360-degree awareness that overwatch demands.
VOD review is critical. Record your games (built into the game now, or use OBS if you want your perspective specifically) and watch from your POV. Every time you die, ask: was my position the problem? Could I have spotted the threat earlier? Did I communicate what I saw?
Practice specific heroes in their overwatch roles. Don’t just play Widowmaker to click heads, play her specifically to practice maintaining overwatch positioning, rotating as fights move, and calling out what you see. The mechanical skill matters less than the decision-making at most ranks.
Scrim with a team if possible. Overwatch positioning in a 6-stack (or 5-stack in OW2) against another organized team is completely different than ranked solo queue. You’ll learn how coordinated teams punish bad positions and how to set up proper crossfires with teammates you trust.
Finally, watch high-level players and analyze their positioning. Don’t just watch for flashy plays, focus on where they stand, when they rotate, and how they balance aggression with safety. Streamers often explain their thought process if you watch with chat open or listen to their comms.
Conclusion
Proper overwatch isn’t a single position on a map or a one-size-fits-all strategy. It’s a mindset of controlling space, supporting teammates, and maintaining awareness while minimizing your vulnerability. Whether you’re grinding through Platinum or competing in Diamond lobbies, the principles remain the same: take positions with sightline control and cover, communicate what you see, adapt as fights develop, and rotate when your position stops providing value.
The difference between players who stall in mid-ranks and those who climb is often just a better understanding of positioning fundamentals. You don’t need perfect aim if you’re shooting from positions where enemies can’t effectively return fire. You don’t need to be the mechanical god if you’re consistently spotting flankers and calling them out before they get value.
Start small. Pick one map and learn three overwatch positions for your main hero. Practice rotating between them. Build awareness of when those positions work and when they don’t. The mechanical execution will follow once you’re consistently in the right place at the right time.


